
Ever notice that the face staring back at you in the mirror looks picture-perfect, yet when you snap a selfie or even pose for a friend, it’s quite a different story. What’s up with that?
When it comes to your makeup in reality, the camera picks up on different things which can result in a less-than-flattering shot. Whether your goal is to look your effortless-best in selfies, professional photos, or even on your Instagram and other social media profiles, a little photo-makeup know-how goes a long way.
No, you don’t have to change your makeup completely! You just need to make a few simple tweaks so that the camera can pick them up perfectly.
Much of it has to do with lighting, so be sure to check out this post I wrote about the best light for makeup application.
What you see in the mirror can be all wrong when the camera works with the light. So, in reality, you DO look smokin’ hot, but in that photo, not so much.
Remember how Cher in Clueless tries to set the right lighting in her home when Christian comes over to watch movies? It’s all about that lighting!
But unless you’re having a professional photographer manage that one, you’ll usually be on your own. Instead, if you make the right little changes to your makeup, the lens will love you in any lighting.
With makeup, the key is the definition. If you’re skipping this step, it’s no wonder you’re pictures aren’t coming out as flattering as you’d like.
With lighting, background, angles, and all those things to work with, we’re going to tackle the makeup mystery behind making your photos look extraordinary every time. No more embarrassing photos you have to delete on sight!
Read on for the best tips for a flawless photo-shoot and you’ll be privy to the best secrets from the pros who handle the faces of your favorite influencers and make them look perfect in every shot!
1- Prep your skin first
Hopefully, you already moisturize prior to applying your makeup. There’s no need to change your skincare routine (unless you’re not using the right products for your skin type). All you need to do is complete your skincare regimen prior to putting your makeup on.
If you’re having professional photos done, you should do a deep cleansing or deep hydration mask about 2 days prior to giving your skin an extra look of refreshment.
Why 2 days? Simple! Because many masks are designed to draw out gunk from deep down in your skin, it might cause a blemish which would be a mess for your photo-shoot. By doing it a couple of days before, everything should be clear by then.
There’s something else you should note. When you’re going for professional photos, do NOT use your SPF daytime lotion. Oh please don’t!
It leaves a white casting in professional photos. Definitely not your friend during a photo sesh, so skip the SPF and use one sans SPF.
Once you’ve let your moisturizer soak in, apply your primer. We’ve talked about choosing a good primer before. It’s the key to having a flawless face in any light.
Smooth it all over your face. Yes, under your eyes too. You want to blend it down onto your jawline and down your neck too.
Primer fills in any fine lines and helps smooth away imperfections that the all-too-perceptive camera will just magnify. Get a good one like this one by Laura Geller and your skin texture will look absolutely flawless both on and off camera. You: 1. Camera: 0.

- keeps the skin hydrated
- Allow a smooth makeup application
- Free of parabens, phthalates, and synthetic fragrance
- Cruelty free
With this Laura Geller New York Spackle Skin Perfecting Primer you can prep and perfect your skin for a “no make up” makeup look.
What are the benefits? This skin-perfecting award-winning primer visibly reduces lines for a flake-free, matte second skin that’s perfect for seamless makeup application.
The unique formula acts like an invisible shield to help prevent transepidermal water loss while hydrating skin for up to eight hours.
How do I use it? Apply two pumps of the lightweight, fragrance-free primer onto your fingertips and blend evenly over clean, moisturized skin before makeup application.
2- Prevent flashback by using the right foundation
The camera’s flash can most certainly be flattering, but with the wrong foundation, your skin will look washed out and pale.
Again, part of that is SPF. For your professional photoshoot, use a foundation that either doesn’t have SPF or the content of SPF is minimal.
When foundations have high levels of SPF, there’s too much zinc oxide and titanium dioxide in it which is great for protecting you from UV rays but makes you look like you’ve got a mask on in photos.
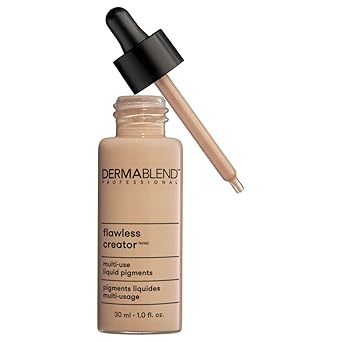
This one by Dermablend does the job. Especially, if you are looking for a natural makeup that includes only the best ingredients, then this foundation by Dermablend is definitely for you!
And since this product is made up of very few ingredients, it is suitable for sensitive skin and will not cause any irritation or undesired effects.
It includes a shade for everyone so there is absolutely no way you will not find your match.
Plus, it includes a pump dispenser to help you control how much product you use and saves money in the long run.
And don’t let the light weight formula foul you, as this medium-weight tinted foundation, will provide an even, full coverage for your face ,when used with a buildable technique.
The Dermablend Flawless Creator Multi-Use Liquid Foundation does not contain oil or fragrance, so you will not experience any breakouts. It will neither clog your pores, nor leave any weird residue behind.
Instead, it will go along with your skin’s natural oils and does not leave any weird residue.
- Full Coverage Foundation
- Non-Comedogenic
- Vegan and without Parabens.
Laura Geller New York Baked Balance-N-Brighten Color Correcting Foundation is also a great option for anyone looking to balance their skin tone.
The brand has had consistent success in the cosmetics industry and is known for its ability to provide an innovative customer experience while also offering high-quality products.
This foundation was designed with color correcting swirls of multicolored liquid that work together to brighten, even out skin tone , and correct dark spots.
The result is a radiant complexion that will leave you feeling comfortable and looking young.
Laura Geller New York Baked Balance-N-Brighten Color Correcting Foundation lasts all day and doesn’t dry out your skin.
This makeup has a creamy texture that is easily blended with a sponge or a brush depending on your preference.
And, The foundation formula provides the easiest application that will create a flawless complexion in seconds.
It comes in a cute color palette of shades that will match any skin tone.
If you are looking to get more out of your makeup, then Laura Geller New York Baked Balance-N-Brighten Color Correcting Foundation is for you.
- Full coverage foundation
- Creamy formula for a flawless look
- Ideal for all skin types
HD powders are also a big no-no. We’ve all snickered at the weather girl on TV when you see white patches on her face.
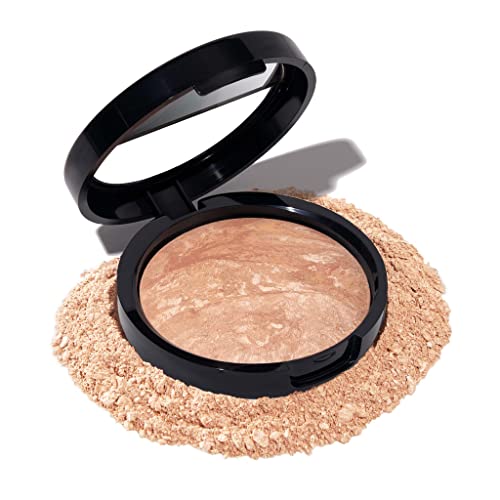
Skip the HD white powder and go with colored loose powder like this one by Dermablend or even a regular powder compact.
At first glance, it may seem like this product is just an over-hyped translucent powder, but it has a lot of potential as a setting powder.
Setting powders help to seal your makeup and prevent your concealer from creasing and wearing off throughout the day.
It also helps set your look and give you a more matte finish, which is perfect for keeping your makeup in place if your skin is more on the oily side.
Aside from all of this, I’ve also noticed that it works to minimize the appearance of pores and fine lines, which is great if you don’t want them to show through your foundation.

- For Light, medium, and tanned skin
- Mattifying Finish
- Non-comedogenic
P.S. The more coverage your foundation has, the more coverage your setting powder will have. So if you wear a lot of foundation underneath, make sure that you use a really good quality loose setting powder to help lock everything in place!
3- Don’t forget about your neck
Another thing to avoid is simply stopping your foundation application when you hit the jawline. You need to blend it down through the neck. Ideally, your foundation should match the skin color of your face and neck.
Always pair the foundation with the tone that is darker. In-person, this wouldn’t be noticeable, but with flash photography, it would stick out like a sore thumb.
You might think this is silly, especially when you look in the mirror. You look fine, so what of it? Well, when that flash goes off, it will show the contrast of where you stopped blending at your jawline. Then you’ll be one of THOSE girls.
A good idea is to go with something that isn’t full coverage. Something sheerer will match beautifully and keep you from looking caked-on during the photo-shoot.
4- Upgrade your under-eye concealing skills
One thing about flash photography or even the camera on your iPhone is that it can bring out dark circles. Ever take a selfie and look immediately in the mirror, distraught that you look like a raccoon? Concealer is your friend so use it.
I’ve been using Dermablend Cover care concealer for over a year now and I absolutely love it.
It’s my “secret weapon” whenever I want my skin to look its best. I like that it has pretty high coverage (full, at least), and it lasts all day (or night, depending on what I’m doing). I have extremely sensitive skin and it doesn’t bother me at all.
I usually put it on with a brush, so I can get more precision, but my new favorite way to apply it is using an angled eyeshadow brush.
The angle fits perfectly on the inside of my eye and it makes putting concealer on that area much easier. Plus, it will save you some product, because you don’t have to use as much.
I usually use this concealer to cover up the dark circles under my eyes and any discoloration I have. It does a great job at covering both, even if I don’t apply anything over it.
You should definitely give it a try if you’re looking for something with high coverage!

However, you need to be careful to avoid having reverse raccoon eyes. That’s when you look like you have white circles around your eyes rather than dark circles. Can’t a girl win?
Yes, actually.
Simply mix a little of your under-eye concealer with a bit of your foundation before applying. This keeps your concealer from popping out with white when the flash hits it.
Got a few small spots or blemishes? Call on your concealer again. For those, concealers that have yellow undertones are best to hide flaws.
5- Contour and highlight
You don’t need to be like the Kardashians and do contouring and highlighting for even a simple trip to the store.
But when you are taking professional photos, you shouldn’t skip it. Doing this will emphasize your features by adding definition and keep your face from looking wide and flat.
Simply dust powder bronzer or a shade of contour just below your cheekbones and also on your forehead. After that, blend it into the rest of your makeup.
This trick will frame your face and add the life back into it when you’re in a photo.
Cargo Bronzing Powder is an essential for every makeup artist’s kit or any woman who wants an effortless look in seconds!
This silky bronzing powder blends seamlessly into your skin to create a natural-looking tan that lasts all day without fading or streaking.
The silky-smooth formula is perfect for applying with your fingers, and it’s safe for use on even the most sensitive of skins. It’s buildable, non-drying, fragrance-free and oil-free.
For best results, apply Cargo to clean, moisturized skin using a Kabuki brush. And you’ll achieve an exotic “I just got back from holiday” look, that will not only take your photos to the next level but, will also, have heads turning wherever you go!

- Ideal for all skin tones
- For a matte effect
- Perfect for a sun-kissed look
Adding a shimmery highlight shade on the high points of your cheeks and the bridge of your nose will finish it off and can even thin your face out. Hmmm…maybe we SHOULD be doing this every day!
That highlighter should go above your blush. You can also add it to the corners of your eyes to bring out more light for the high points of your face.
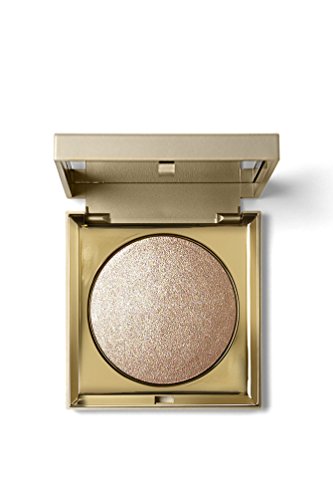
This highlighter by Stila was so good I had to buy it twice. It is very pigmented, so a little goes along way with this product. The powder is super fine and very light weight.
This brilliant highlighter is easy to apply and blends well into your foundation or concealer without leaving a powdery finish over the top.
I would recommend brushing it on, let it set for about 10 seconds, then gently blend in circles until you’ve achieved the brightness you want.
Another good feature is that even with a heavy hand, it looks natural and doesn’t leave veins of color on your face
As with all Stila products it stays put on my skin and doesn’t fade through out the day.
Stila Heaven’s Hue Highlighter is a great option for photographs or events outdoors, where natural looking-highlighting is desired!
The key is a matte finish on the contour and shimmer on that highlighter. The effect is warmth, definition, and brilliance to counteract the wash-out of those bright camera flashes.
6- Blush is your BFF
At the office, if you turn up with a bright blush, it might be just a bit much. But on camera, you need to go brighter. Blending around the edges is important as well as choosing a blush that gleams.
Just don’t pick one with noticeable sparkles. Going for the gleam will give you a radiant look under a flash.
Blush always fades on your face almost as soon as you put it on. That’s why applying more of it, especially for photos, will always suit you well.
Powder is almost always the best option unless you’re a pro at blending creams. If you want a fool-proof blushed look, use the powder, go brighter with a gleaming blush, and blend it well.
Another important tidbit about blush: When you use your daily blush, if it has silica in it, it’s no big thing.
But for a flash photography session, it can flash out and go white. Look for a blush that is free of silica instead, like this one by Bare Minerals! I am so completely obsessed with this beautiful baked blush.

- Tested by dermatologists
- Suitable for all skin types, including aging and sensitive skin
- For a radiant effect
One of my favorite features about this product is that you can apply it on your cheekbones, your nose bridge (which makes an awesome contour), or on your cupid’s bow (for plumper lips).
To get that sun-kissed glow, sweep this blush on areas where the sun would hit such as the tops of cheeks and temples, and you’ll get a bright, golden sheen.
The powder itself has a soft texture and goes on so smoothly. It blend beautifully with the skin and looks so natural.
It feels like butter when you touch it, and the color is very brightening and luminous. It’s so flattering on any skin tone!
And did I mention how amazing it smells? Sounds like some dreamy makeup right? Well it takes dreamy to another level! And your photos too!
7- Set your face with powder
Now for the powder! You should always apply it to shine-prone areas. When you’re young, under the eyes is important, though as you move onward in your 30s and 40s and beyond, powder can bring out any fine lines and wrinkles you have, even when you’ve applied primer.
Instead, stick to the T-zone and hit it with loose setting powder. It should be translucent to lock it in place without creating a cakey or washed-out look.
And go easy on the stuff too! Too much powder never looks attractive, and in photos, it can only make you look chalky.
8- Frame your brows
Your brows frame your eyes and bring out the bone structure of your face in photos. Even if you have a strong brow-game, you should subtly fill them in with just a bit of brow pencil.
The tails of brows always tend to vanish into thin air once the camera snaps a photo. Do it right too.
Brush your eyebrows upward first so every hair is going in the same direction. Then fill in from the inside outward using very small, short strokes to mimic the look of hair.
Starting at the bottom of your brow and working up gives it a more ombre effect that looks very natural in real life and in your photos. With properly filled brows, it will really bring out your eyes.
This Anastasia Beverly Hills DIPBROW Pomade is one of my holy grail beauty items!
It delivers intense color with a creamy formula that goes on smoothly and blends easily and it comes in eleven different shades.
The smudge-proof, waterproof formula stays put all day, yet removes easily with an oil based makeup remover.
This eyebrow pomade has become so iconic because it’s the go-to product of many celebrities, and for a good reason!
Before discovering it, I used to complain about my eyebrow pencil running out so fast, without getting the most out of it.
However, once I switched over to this pomade, I realized that a little goes a long way with this super-pigmented formula. You only have to dip your angled brush lightly into the pot, and you’re ready to go!
The product itself lasts forever! I’ve had mine for at least a year and I haven’t even used half of it. It’s such a good value, because you get the quality of high-end brow products without the hefty price tag!
So, give it a try if you haven’t already, I’m sure you will fall in love with it just like I did!

- Ideal for oily skin
- Smudge-proof formula
- Long-lasting
Don’t have a pencil? Use eyeshadow with an angled liner brush and choose a shade that is about one shade lighter than your hair color.
The only exception to this rule is if you are blonde. Going lighter will make you look funky, on and off camera, so go one shade darker.
And if you’re using eyeshadow to fill your brows, try a trick from the professionals. After you fill most of your brows in, use a shade darker at the tails of your brows. It gives you mega-definition without looking fakey-fake!
9- Apply eyeshadow
And now for the big palette…eyeshadow! Your eye color is very important to play up here. If you have blue or green eyes, you’ll look your best with warmer shades. Think peaches, or even golden or reddish browns.
Have hazel eyes? Choose pinks, purples, or grays. Brown eyes are luckiest because they’re neutral and you can get away with just about any color.
But don’t go smudging it on your lids just yet!
You need to add definition and depth to your eyes or they will look flat. On the inner corner of your eye, you’ll want to use a lighter shade.
For the rest of your eyelid, you need to choose something in a medium shade, and the darkest shade of your chosen color scheme goes in the crease.
Then there’s the style. On camera, eye makeup looks best when you either blend it like crazy or keep it impeccably precise. For example, if you’re doing a smoky eye, finish it by diffusing the edges with a soft brush.
Or you can go harder by applying liner and then using a flat stiff brush with just a touch of eye makeup remover to sharpen out the tail. You can remove any excess in one fell swoop, then dust that area on the edge with powder to set it.
Liquid liner looks amazing in photos too. The key is to line your eyes with a very thin line super-close to your lashes.
This adds more definition to your eyes in photos and by keeping it tight on the lash line, makes your lashes look more dense, full, and beautiful.
10- Apply mascara
Speaking of lashes, once you’ve got your eyes lined and filled, you should give those lashes a curl. Nothing looks better than sexy, curled lashes.
You can read up on my post for how to do it just right without damaging your lashes here!
When it comes to mascara and photos though, you need to choose the blackest black. A formula that makes lashes look extra thick and extra-long is ideal for helping them stand out in photos.
This mascara by Maybelline New York has gotten so much hype in the past few months, and I can clearly see why!
This product really lengthens your lashes without clumping or making them look spidery! They will also look fuller.
The Maybelline New York Lash Sensational Sky High Mascara has an excellent brush that makes the application process so much easier and faster!
And The actual mascara tube itself is really cute too! It looks like an airplane cockpit! Cuteness overload.
It’s also easy to take off, which is something I like in my mascara! Another plus? It’s fairly cheap for a drug store mascara!I have to say it really is one of the best mascaras I have ever used!

- Lengthening mascara
- Waterproof
- Smudge-proof
Allow your first coat to dry and then apply another coat. Repeat yet again! While that may be excessive to use three coats of mascara for a regular day, when you’re posing for photos, it is essential that your lashes look luscious.
Want extra drama? Then use fake lashes. Our advice though: if you’ve never used them before, you should practice applying them well in advance of your photoshoot.
You surely don’t want a makeup mishap going down just before you show up. Fake lashes require some care too, so be sure to read our post about them here!
11- Define your lips
Some women live by their lipstick while others prefer to only reserve it for special occasions. Honey, this IS a special occasion. You need to wear lipstick for your photo-shoot.
Often, foundation and powders that you apply on your face during the rest of your makeup application wind up on your lips.
You should move that out of your way with a little moisturizing lip balm and then sweep it away with a cotton swab. Then, get out your lipsticks!
Which one to choose? Always go with one that is in the middle. You don’t want something too bold, and conversely, you don’t want something too light. Don’t forget to line your lips either.
You should choose a neutral lip liner or one that matches the natural tone of your lips. Then, line your lips and fill them in with your chosen lip liner.
Still stuck on color? Something pink or plum usually works well depending on your skin tone and hair color. A small dab of clear or even light pink gloss in the center of your lips will work wonders.
Just dab it into the center and gently rub your lips together to blend it. It will make your lips look fuller and plumper.
Another rule of thumb: If your lipstick is barely noticeable when you look in the mirror, or it’s all you see, then you need to pick a different color.
Not keen on lip liner? At the very least, line that cupid’s bow and your outer corners to define your lips without looking too harsh.
But do remember that studio lights and a professional camera always soften your makeup by around 50%. So, you might feel overdone, but cheeks and lips are key to emphasize in photos or they disappear.
12- Finishing up
Now that we’re all done, take a good look at yourself! Gorgeous! But first, make sure everything is blended. While in real life, it’s nominal, in photography, it can really jump out in the wrong way. Once you’ve checked to be sure, use a setting spray. This will keep your makeup in its place.
Pack your concealer, lipstick, powder, and blotting papers to take along too. Because under hot lights or in warm weather, makeup will melt away. It’s even more prone to slippage if you have oilier skin. In fact, you might want to read up on our makeup tips for oily skin post here!
Oh yeah! And we almost forgot! Before you get ready for your photo-shoot, like the day before, make sure you preen your brows for stray hairs. Pluck, wax, or tweeze as you normally would but giving it a day before you go to the shoot is important so you don’t have a red or swollen look.
Now for the shoot! Where will it take place? If you’re going for something outside, you should do a trial run with your makeup look and see how it looks in natural lighting. A hydration mist is a must-have for this, especially in warm weather. This will keep you looking fresh-faced and camera-ready no matter what!
Conclusion
So now you’re officially ready. Revel in how beautiful you are! Remember that doing these little tweaks to your makeup routine is essential for looking your best on camera. It’s not about creating a new makeup routine or even forging a new face, but rather, understanding how the camera works.
And as is the case with professional photos, know that you will always have some that look bad when you’re in motion. The photographer may make you laugh to get that perfect shot and the shots in between it won’t be the ones you’ll be using. Photographers snap tons of photos during the shoot so you’ll have your pick of your favorites. Don’t forget the most important thing too… smile slightly! It will always brighten your face naturally and capture your inner beauty every time!