
Ever play with your hair and look at the ends? We all do. And when you do, perhaps you’ve noticed white dots on your hair tips. But, like, what ARE they?
It’s a lot more common than you might think. And of course, it’s for those of us with longer locks, where we can see the ends of them. It could happen to shorter hair too, I suppose, but not a pixie cut. If you’re keeping your hair short, chances are it stays in good health.
And that’s what’s happening here with those white dots on the ends of your hair. There’s nothing to freak out about, but it is something you’ll want to work on correcting for the health of your hair.
Keep reading, and I’ll explain more about those white dots on the ends of your hair and what to do about them!
Why You Have White Dots on Hair Ends
White dots on hair ends indicate the strand is broken. This tends to happen most commonly from excessive use of heat styling tools or chemical treatments. It can also happen from wear and tear or lack of moisture. It reveals damage to the hair structure.
This kind of split isn’t like usual split ends either where it feathers off. The white dots are very telling that you have damage to your hair. You can easily snap the ends off your hair when you apply gentle pressure. You can’t reverse it either.
However, there are things you can do to your hair to help it improve and rid yourself of those white dots.
How to Get Rid of White Dots on Your Hair Tips
Yes, it’s a good thing you noticed those white dots on the tips of your hair because now you can do something about them. Please know though, that it will take time to heal your hair, but the healing process can (and should!) begin now. Keep reading for the ways you can get rid of those white dots.
■ Trim Your Hair
Your ends will snap off because they’re so weak. It’s tempting to just pick at them, but that only makes things worse. It will just keep your hair looking and feeling brittle.
If ever there was a time to splurge on a professional cut, it’s now. It’s worth it, and you’ll get an even look and a style you love.
Trimming your hair is the only true way to treat this kind of damage. You really can’t repair these fractures. They must be removed, and you must be patient to let it grow again in a healthier way.
Plus, you don’t want those unhealthy ends to keep fraying further up the shaft. That will mean that you’ll have to cut off even more of it and who wants that?
■ Follow a Healthy Hair Care Routine
Sorry, but you need to cut your hair—at least some of it. Again, a stylist can help you there because they will be able to find the right length to cut to help remove those damaged parts.
And then, the healing can begin with new healthy hair care habits that will protect your newly-cut hair.
One of the things you should incorporate is a reparative mask. Do it weekly to help give your hair extra moisture and hydration so it won’t dry out.
Additionally, you should minimize your usage of heat styling tools as much as you can. But when it’s inevitable, use low settings. And never, ever, ever skip using a heat protectant.
This will protect your hair from further damage. Make sure you’re not lazy and section off your hair, spraying as you go to ensure each part you expose to heat is well covered and protected!
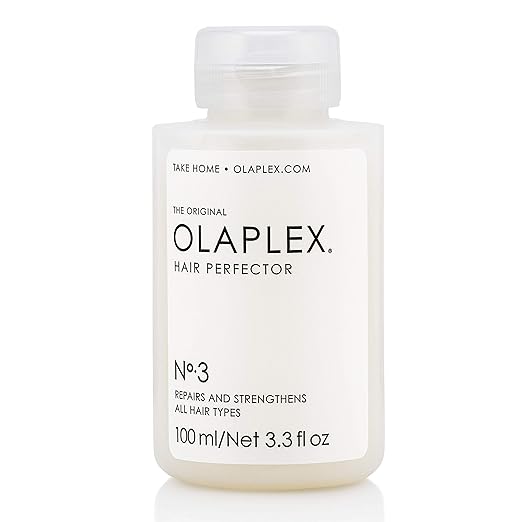
- Repairs Damaged Hair
- Relinks the Broken Bonds of the Hair
- Paraben-free, Sulfate-free, Phthalate-free, and Vegan
Take your hair to the next level with Olaplex No. 3 Hair Perfector. This repair treatment penetrates, fortifies and heals stressed hair.
Olaplex is perfect for at home use. It works to help rebuild bonds and the result? Silky smooth, healthy looking, hair that’s stronger than ever before!
I adore Olaplex No.3 Hair Perfector and Briogeo’s Deep Conditioning Mask. Take your pick, or take them both. These really work wonders for improving your hair’s condition after you get that trim.
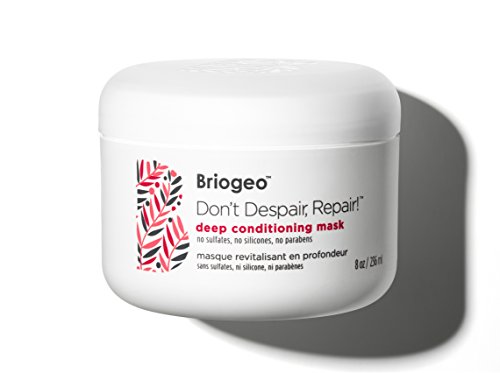
- Repair Severely Chemically Damaged Hair
- Cruelty-Free
How to Avoid Getting White Dots in the Future
After trimming and caring for your hair with more intensity, you’ll want to avoid getting those white dots ever again, right?
Of course! But there are a few things you can do to make sure you never go through this hot mess again.
Basically, it involves:
- Less heat
- More protection
- Regular trims
- Change in bedding
- UV protection
- Proper styling tools
■ Chill with the Heat
I love my heat stylers, but I do take breaks from them here and there. When I’m not in a hurry, I let my hair air dry first. Then I use either my curling wand or my straightener, depending on my mood. And I use a lower setting.
■ Always Use Heat Protection
When you use your hair dryer, curling wand, curling iron, flat iron, or anything with heat on your hair, cover it well with heat protection spray. Don’t skimp! You’ll thank yourself later.
■ Try Foam Rollers Instead
Foam rollers are a great way to get curls, volume, and bounce without all the heat and damage. I love using them when I’m relaxing at home.
■ Keep Regular Appointments with Your Stylist
That trim to remove the white dots isn’t a one-and-done situation. You need to make sure you regularly go to keep your ends healthy. Especially if you don’t want white dots on the ends again!
■ Deep Treat Your Hair Weekly
I think one of my favorite beauty rituals is putting on Netflix while I have a hair mask in my hair. When I wash it out, my hair feels just so amazing. Ever since I’ve been doing this, I can tell you my hair has been in fantastic condition.
■ Change Your Pillowcase
My stylist suggested I use a silk or satin pillowcase. She said cotton sheets, even with a high thread count, cause friction on the shafts of your strands.
It’s also a good option for skin too because it will help keep from bunching your skin up and causing wrinkles.
■ Never Sleep with Wet Hair
Wet hair is more delicate. This is why we’ve always been told to use a comb on wet hair and not a brush. And trust me, you do not want to put your wet hair on your silk pillowcase. Wash it and make sure it’s dry before you turn in for the night.
■ Protect Your Hair from the Sun
The sun causes mega damage to skin, so why would hair be spared? There are great leave-in SPF treatments you can use for your scalp and hair health to protect it from damaging UV rays. You can also wear hats or tie a scarf over your hair.
■ Drink Plenty of Water
Hair, like skin, reflects your inner health. Start by nourishing your body with proper amounts of water. Don’t forget to eat healthy foods more often than not.
Unfortunately, you can’t get the most beautiful hair of your life if you’re only eating Twinkies and pizza.
■ Detangle Wet Hair with the Right Products
Long, thick hair needs some extra love. Look for a detangling spray that will help you comb through it more easily. If you have trouble combing through your wet hair without hitting snags, this is a must!
■ Don’t Over-Wash Your Hair
You shouldn’t be washing your hair every day. Those natural oils from your scalp need to nourish your strands. If your hair is overproducing oil, that means the scalp is dry, and you’ll have to repair it first.
■ Handle Wet Hair the Right Way with Towels
Towels can also cause damage on wet hair. You should pat your hair dry but avoid rubbing it. Hair swells with water, and this makes it more susceptible to breakage.
A better idea is to take an old cotton shirt you no longer use. This helps you dry your hair without destroying it.
■ Choose Ion Technology
We love our heat styling tools, but those with ion technology are the best options. It won’t strip out as much moisture.
The ions split the water molecules that are in your hair down into smaller bits, and it seals the outer cuticle of your hair, leaving it nice and glossy too!
■ Look for Ceramic Coating
For curling or straightening heat stylers, look for ones with ceramic coating. These distribute heat much more evenly, which helps prevent damaging and breaking your hair. They tend to glide much more easily too.
■ Brush Your Hair the Right Way
Don’t pull a Marsha Brady and brush your hair from top to bottom anymore. That’s old advice! Instead, start at your tips. Work your way up in sections and THEN brush from top to bottom.
Conclusion
Now that you know what has caused those white dots, take the tips in this post and go do something about them. You’ll soon see healthier hair that looks and feels like you dreamed it would!